In a previous post I have described what happens to the computer when the operating system is upgraded from Windows 7 to Windows 10 and the hardware stays the same. Windows 10 running on an older hardware that was perfectly fine with Windows 7 can make the computer almost unusable and lead to the 100 per cent disk usage issue.
After having upgraded the system to Windows 10 or Windows 11, it is necessary to upgrade the hard drive from a mechanical hard drive to a Solid State Drive (SSD).
This tutorial will explain how to upgrade your hard drive from a spinning internal hard drive to a SSD without losing your data.
1- GETTING READY FOR THE UPGRADE
What you need is an SSD that’s at least at equal size of the spinning disk that you currently have so if you have a one terabyte drive make sure you get a one terabyte SSD. If by mistake you are getting an SSD that is smaller than the mechanical hard drive, you have two choices:
a) Or you return it to the store and exchange it for a same size hard drive
b) Or you must reduce the size of the partition on the HDD to the size of the smaller hard drive you have just purchased.
2- GETTING YOUR HANDS ON YOUR DESKTOP COMPUTER
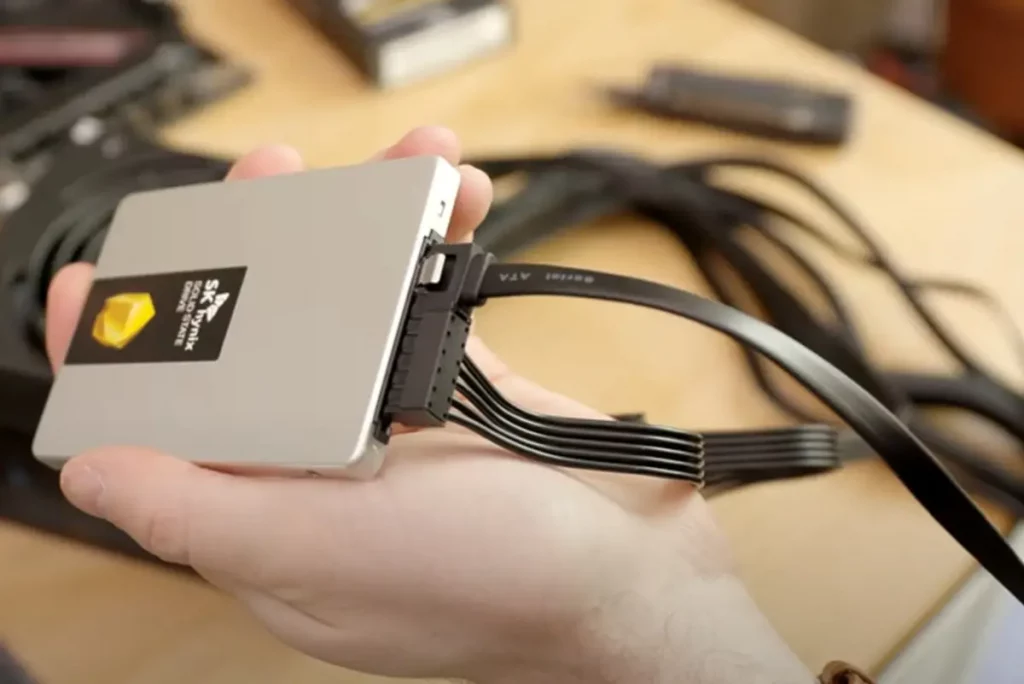
The first thing to do is to remove the side panel of your desktop computer. If there are some screws on the back of your system that you can remove them with a screwdriver to get the side panel off. All systems are different, but most systems have screws on the back, and they have a side panel that will just slide off. After having removed the side panel, you may want to get a sata cable so that you can plug the SSD to the motherboard. Now the computer will see the mechanical hard drive and the SSD like a USB devices attached to it. If you don’t have a sata cable, you may want to use the one that feeds the CD rom. Without completely removing the CD ROM, you can just unplug the sata cable from it and plug it to the SSD. This is just a temporary situation and at the end of the task, you should be able to put back the sata cable to the CD ROM.
3-USING THE RIGHT SOFTWARE FOR THE UPGRADE

The software required will create an image of the system that would have to be transferred to the new SSD. In order to do that you need a blank usb thumb drive that will host the image. I recommend using a 16 GB flash drive. Go to your browser and search for Clonezilla. Once you are on Clonezilla website, go to downloads and click on stable. The download type you need is an ISO and not a zip file. To burn the Clonezilla image to the flash drive we need a second piece of software called Rufus. Download Rufus from here. When Rufus populates, you will see two fields: in the drive properties you will see the flash drive and its size and on the Boot selection you will select the Clonezilla ISO that you have just downloaded. Click on the start button and Rufus will make the USB bootable with Clonezilla in it.
4- IT IS TIME TO CREATE AN IMAGE OF YOUR PC
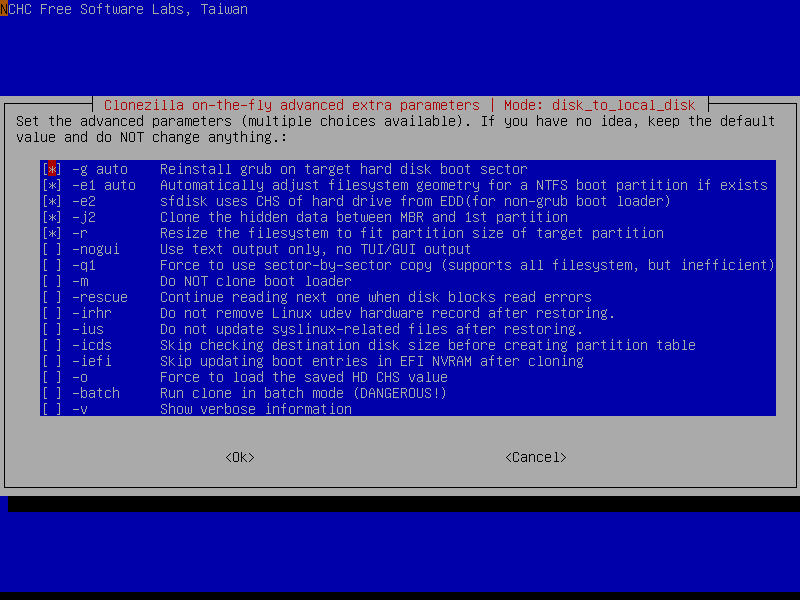
The next step is to boot the computer off the flash drive. This task is accomplished by typing on the keyboard the keys F2, or F12 or F10 depending on the computer make and model you have. You may want to check online on your computer manufacturer’s website what is the right F number to tap before booting the computer to the newly created flash drive. Once you booted up to the flash drive you will see the minimalistic interface of Clonezilla. Select your language, keep the default keyboard layout. Pick the option “device to device”, choose the expert mode, disk to local disk clone. A new window will prompt you to pick the source disk: you may want to select the mechanical hard drive because that is the hard drive we want to clone. Click ok and then pick the destination hard drive which is the new SSD. After that a new window with advanced parameters will show up. Scroll all the way in the middle and select -q1 Force to use sector by sector copy as per the image above The next window will ask the user to check or skip the source file system. You can skip to check the source file system. Select to use the partition table from the source disk. After all the menus have been filled, Clonezilla, will warn user a couple of times that all the data on the target disk will be erased.
Once you click ok, Clonezilla will begin its work sector by sector. As the sector by sector is better suited for Windows 10, be patient for several hours and let the software complete its task.
5- GETTING YOUR HANDS BACK TO YOUR PC
Once the clone is completed, we need to shut down the pc and remove the power cord. Let’s now replace the HDD with the SSD. Let’s also remove the flash drive that still contains the bootable version of Clonezilla. Let’s reboot the computer and now you should have a faster pc that boots up from the newly cloned Solid State Drive. If the computer has hard time booting or if it displays a boot error, you can get to the bios and set up the correct boot sequence order which should start with the new SSD. Press F10 to save the new boot order you have established, and your computer will work fine.
THE BOTTOM LINE
You may be wondering why you would want to clone your computer. How does it help me? What problem does it solve? Are there any additional benefits apart from the obvious ones? You wouldn’t need to clone your computer unless something goes wrong. Whether it’s a hardware failure, hard drive replacement – such as in this case- malware attack, software corruption or some other issue, a cloned copy of your operating system will save you time and effort in fixing the problem and getting back on track.
And yes, while cloning your computer can seem like an overkill, there are several good reasons why you should do it. Your primary operating system (OS) is almost always the first thing that gets corrupted or filled with malicious files. Even if you have virus protection or other security measures in place such as a backup, these programs are usually not enough to guard against all possible attacks. Therefore, keeping a clone of your OS as a backup file is always a wise move.