There are several reasons why a business decides to use a business email, such as promoting its brand, building trust with its users, and enhancing the security of its assets. I have already discussed the differences between a business email and an email that is used by single users and the benefits of using a business email rather than an email from providers such as AOL, Hotmail and Gmail.
Several years ago, I was visiting clients in Westchester to troubleshoot their Exchange email server. At that time, the mail server was a server box located in the office; that server, in order to display the emails in the computer clients in the office, needed to be configured to pull the user accounts from Active Directory which was hosted in another server box within the same office. The problem with this setup was that it was not cloud based and therefore having only one mail server in a small Westchester office did not really offer redundancy. If the server broke, the entire mail system would have been down. In addition, small companies did not found value in having more than one server in the office which, in that case, would have been justified and offered a better solution against crashes and downtime issues.
Nowadays, fortunately, redundancy is offered as a service by the big cloud providers and companies like Microsoft and Google provide the right services to businesses who are looking for a reliable corporate email.
This article will guide readers step by step in setting up and configuring a business email with Microsoft 365 and Exchange online.
1- START WITH GOOD FOUNDATIONS: GET THE RIGHT DOMAIN AND HOSTING PROVIDER
Finding a reliable domain provider is crucial in setting up a business email. A business email is linked to a domain name. In my experience, I have used both GoDaddy and Ionos but I have found a better provider in IONOS. I don’t like to see advertising banners and buttons on GoDaddy while I am navigating through the interface looking for something. I wasted a lot of time getting through confusing tabs that redirected me to resources I did not need. Check out, in the image below, how easy is to navigate the Ionos interface once you have logged in with your account:
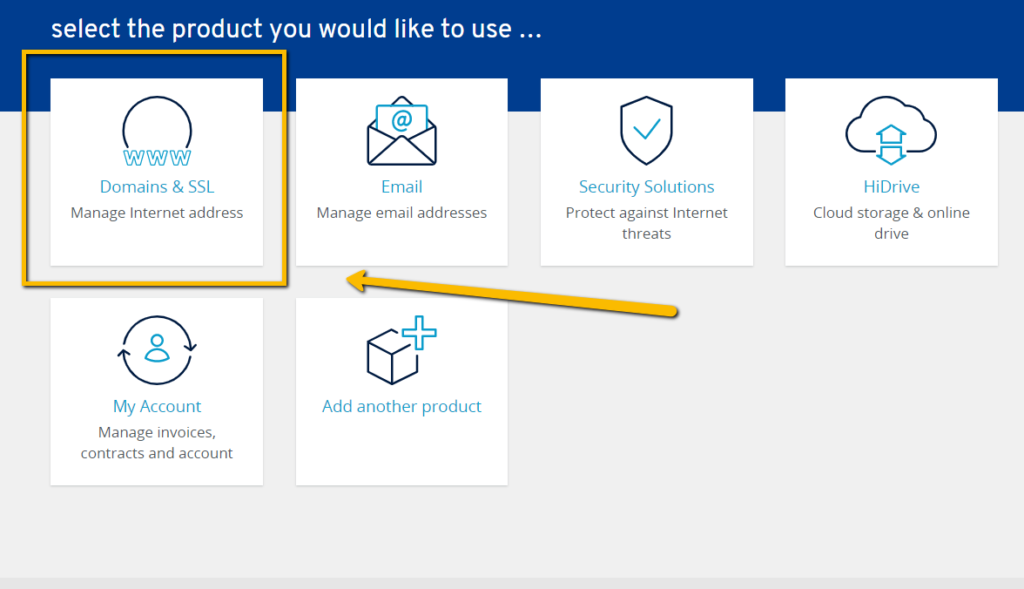
The main tabs you are going to use for your setup will be “Domains” and “Hosting”. You would need to use the hosting tab when you need to create and build your website but for the purpose of this tutorial, we will be focusing on the domains tab, because the domain needs to be tweaked to redirect some of its dns records to Microsoft.
LET ME BE CLEAR ABOUT ONE POINT: I DO NOT RECOMMEND TO BUY MICROSOFT PRODUCTS THROUGH YOUR DOMAIN PROVIDER FOR THE FOLLOWING REASONS:
• For the same monthly fee, you will get more by buying directly from Microsoft.
• Microsoft customer support is easy to reach out and responds quickly if your company is on a business plan.
In Ionos, once you have reached the DNS section of the domain control panel, you will see all the records that your custom domain has. In the following picture, I have circled the TXT and MX records that have to be replaced by Microsoft records:
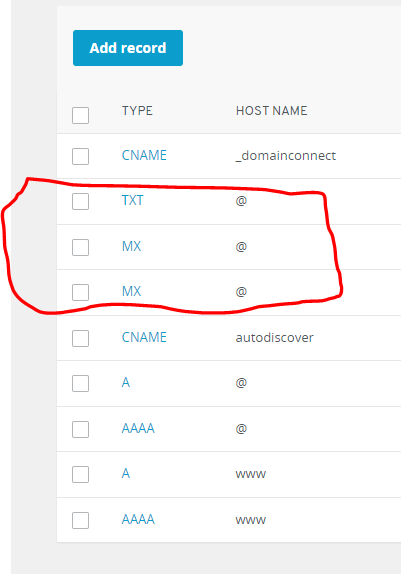
As I have highlighted in the picture above, the TXT and the MX records will need to be pointed to Microsoft servers during the setup of the Microsoft admin account.
2- WHICH MICROSOFT 365 BUSINESS ACCOUNT DOES MY BUSINESS NEED?
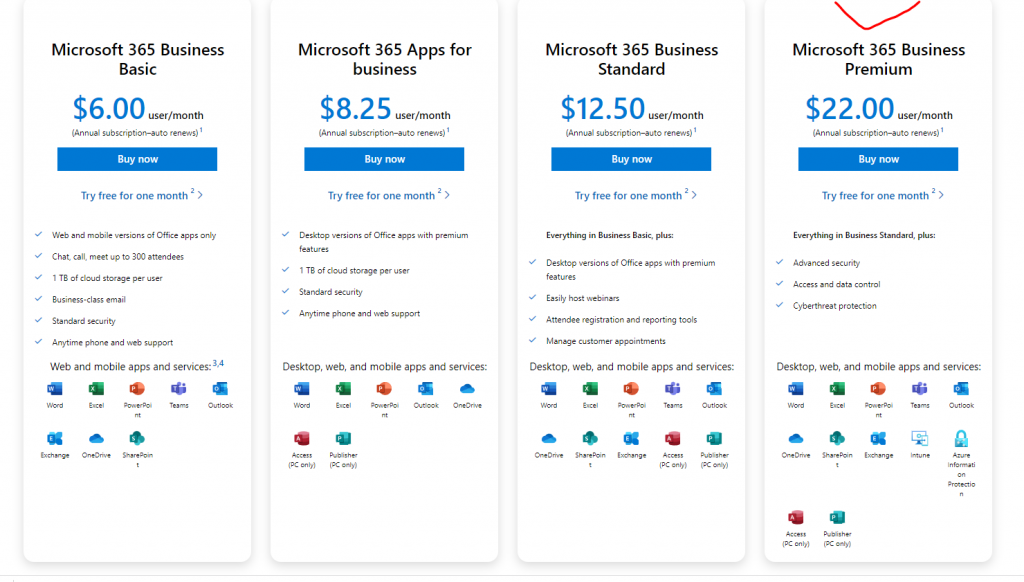
Even if your business does not have many users, I highly recommend to subscribe to the Microsoft 365 Business premium plan, for the following reasons:
- The business premium plan has the ATP feature. The Advanced Threat Protection feature will safeguard your mailbox from viruses, infected attachments, spam and impersonations.
- The business premium plan has Azure and Intune portals. Azure can be setup to allow users to login to their desktops using their email. Intune, on the other hand, can be setup by IT admins to harden and secure the mobile devices used in a business environment.
3- LINK YOUR DOMAIN NAME TO YOUR NEW MICROSOFT ADMIN ACCOUNT
You can buy the business subscription from this link. After you have opened an account with the Microsoft 365 business premium plan, you are now an administrator of that account. The next step an IT administrator would do is to connect that Microsoft account to the domain DNS interface so that the DNS records can be directly pointed to Microsoft. In order to connect the domain to Microsoft, Microsoft will give you three choices:
- A) Buy a domain with Microsoft
- B) Use a domain you already own
- C) Get a Microsoft domain for now and you can add a domain later
In our case, we have a domain name already so we are going to select “Use a domain you already own” (B) and we will enter our domain name. Once we enter the domain name, we need to verify the ownership of the domain name. Microsoft is telling us that we need to add a txt record to our dns records by signing in to our domain registrar. Go to the dns settings and create a new txt record that we will add to our domain control panel as it is shown two pictures above.
4- CREATE USERS AND ASSIGN LICENSES
Once the Microsoft 365 account setup is complete, we can create our first user and we can let the user access the Microsoft products and services the user is assigned to. The most popular and widely used Microsoft services are:
- Outlook Email (configured on the Desktop and online via the Exchange protocol)
- Microsoft Word, Access, Power Point and Excel,
- Microsoft Share Point for collaboration and intranet
- Microsoft One Drive to store and share files and folders with other users
- Microsoft Teams for video conferencing and chats with other users within the same organization.
New users will login to Office.com with the provided username and password but it will be extremely important if, before doing this step, the IT department will enforce the setup of the multifactor authentication so that the new user’s login will be based on three main elements:
1) Username
2) Password
3) Token generated by the Microsoft authenticator app installed on the smartphone.
5- INSTALL THE OUTLOOK APP ON USERS’ SMARTPHONE
Finally, a further step is required to enhance the use of a business email on a smartphone. Microsoft products work at their best if they run on Microsoft apps. If users have smartphones, I do not recommend to mix up personal emails with a Microsoft business email.
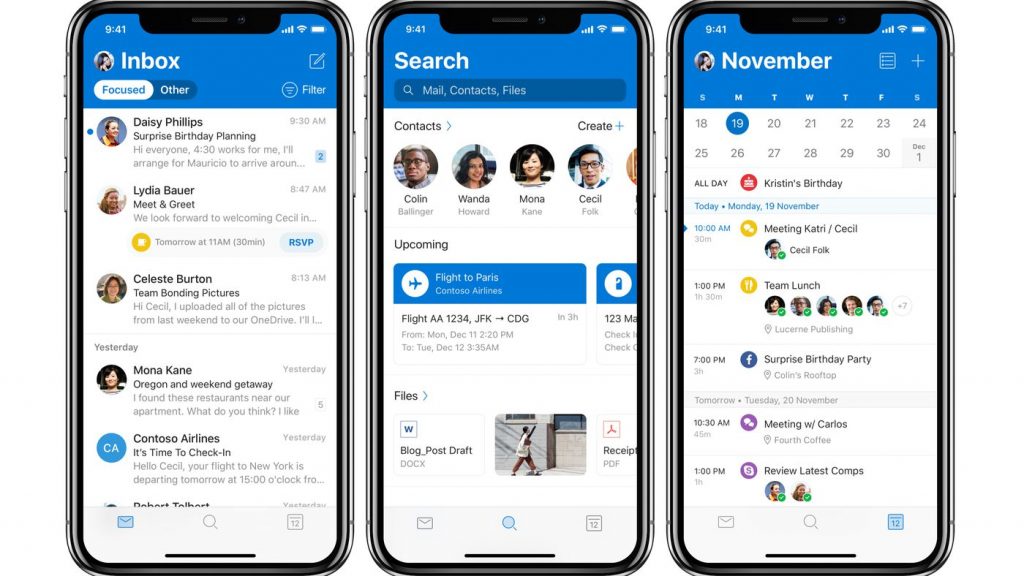
A complete setup offered by and IT consultant should provide the download and installation of the Outlook app on users’ smartphone. As a matter of fact, the Outlook app is really meant for productivity use and will work flawlessly when reading or editing the Exchange calendar.
Having a custom domain that relies on Microsoft 365 to provide a first class business email is the next-generation productivity software that works in harmony across your devices and fully in the cloud.
Business is stronger when your team is not only connected but safer. Microsoft 365 empowers organizations to increase productivity and employee engagement through familiar, safe tools connected across the most popular devices and cloud services.
A business email is safe when there is a granular access to the services. A free email service will never offer services that are tailored to a business, because in a business environment tasks are split between employees and IT department. Users of a business email will be assigned permissions by the help desk and will always have limited access to resources enabled by the administrators of the network.